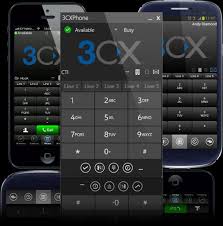
Manage your status and never miss a call
Use the status feature to save time and increase efficiency. You can see which colleagues are available to take calls. Avoid distractions and set your own status to let colleagues know when you're away or don't want to be disturbed.
Choose from Available, Away, Do not disturb, Lunch, Mission, and Set status temporarily.
To go a step further, you can customize your status in "Settings > Call forwarding". From here, you can :
- Define a personalized message
- Activate/deactivate PUSH messages for each status
- Change the name of "Breakfast" or "Mission" profiles
- Set the number of seconds before unanswered call transfer is activated for "Available" and "Lunch" profiles
- Bypass transfer rules based on caller ID and call time
Each status requires a call transfer rule. For example, if a user is unable to answer a call when his status is set to "Available", you can transfer the call to voicemail, and if the status is set to "Do not disturb (DND)", you can transfer the call to his mobile. The following options are available by status:
- Transfer internal and/or external calls to:
- Voicemail,
- Voicemail from another extension,
- The mobile,
- An extension,
- One number,
- End call.
- Simultaneous ringing of cell phones
- Accept more than one call
- Disconnect from queues - automatically disconnects the user from queues. IMPORTANT - this will automatically disconnect or connect you to a queue based on a status change and therefore renders the Connect / Disconnect button useless. Agents should therefore use the status change rather than the connect/disconnect button when this option is enabled.
- Accept calls from call groups
Activating the Automatic Status Change feature changes the user's status to Available according to default or specific office hours. To configure customized office hours and break times, click on "Configure." Outside these hours, the extension will switch to "Do Not Disturb." During breaks, the extension will be switched to "Away."
In the "Exceptions" section you can create exceptions by inserting the"Caller ID", the assigned period in "Received during" and the desired action in "Forward to".
